Posted on Leave a comment

Easy and Healthy Oat Cookies- No Sugar | No Butter | No Refined Flour

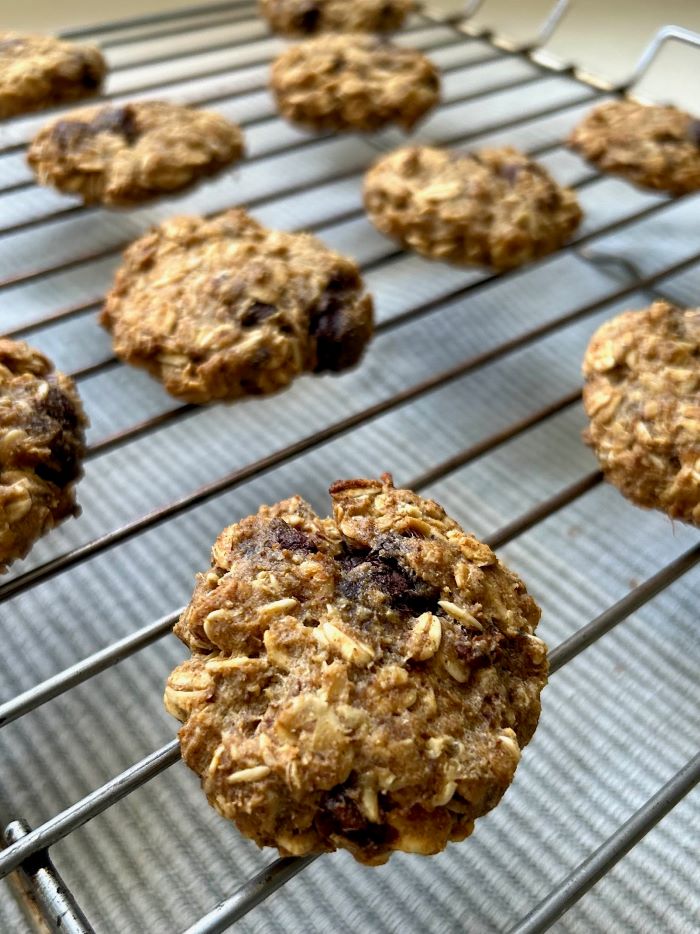
If you are looking for healthy cookies recipe for your kids, this is it! These soft, chewy, perfectly sweet and wholesome cookies will be your go to recipe. I highly recommend this for your sweet cravings and pick-me-up snack moments.

Being a mother I am always on a look out for healthy snacking options for my child. I hate to give him sugary packet snacks everyday. While they are ok as once in a while indulgence but I get wary of all the artificial flavours, preservatives and processed sugar added in bakery cookies. 
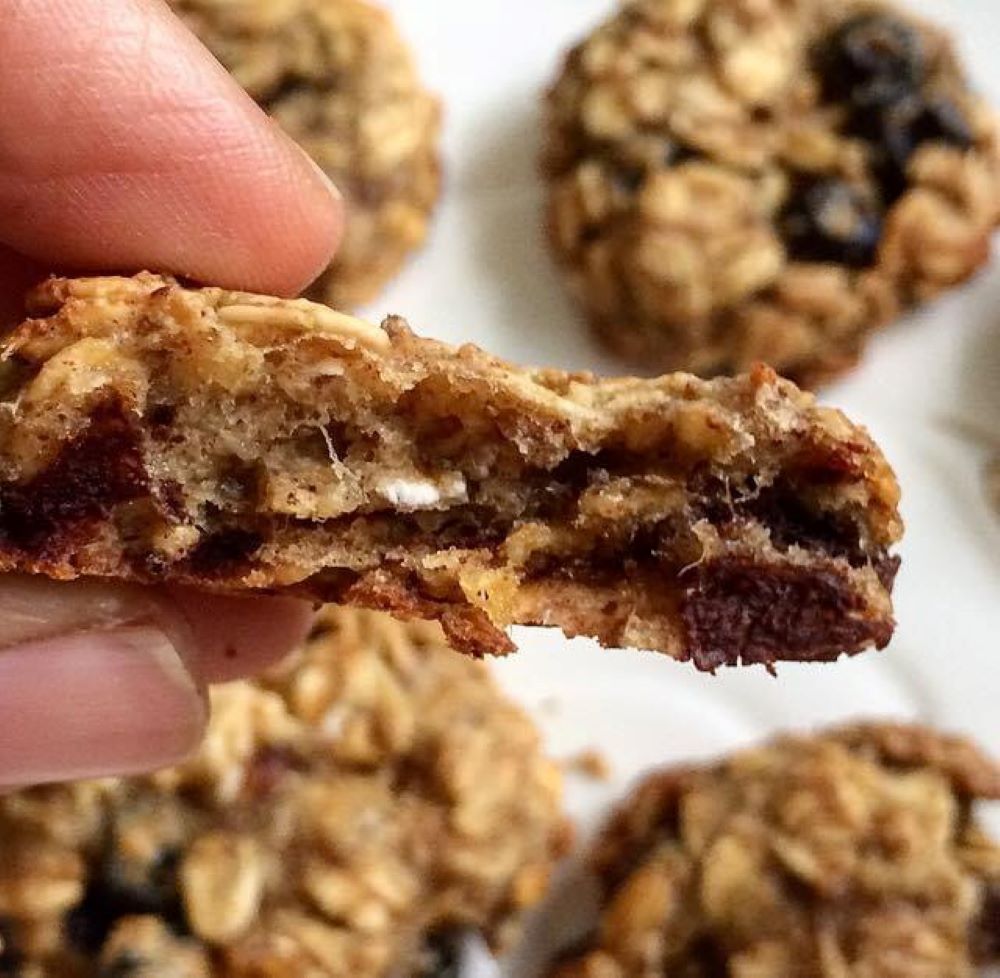
These cookies have the goodness of whole-grains, oatmeal, egg and dates as prime ingredients. The natural sweetness and moisture come from a fruit, dates and coconut oil. The best part about these cookies is that they are one bowl cookies. No endless use of utensils and whisking is required. 

Main Ingredients and their Substitutes

Rolled Oats: I have used rolled oats or old fashioned oats here because they are better for baking. However, you can also quick oats. Quick oats will give you a slightly uniform texture. I however, prefer the taste and texture of rolled oats

Wholewheat Flour: I have added wholewheat flour for more fibre. Also, it brings together the cookie dough and gives nice crunch to these cookies. 

Apple: I like to add an apple in the cookies for moisture and natural sweetness. You can totally substitute apple with either a banana or applesauce. 

Virgin Coconut Oil: Coconut oil offers an almost direct substitute to butter. It lends a sweet but subtle flavour to bakes. You do not need to use as much coconut oil to get the same fat content as butter, since butter comprises 20% water. You can use butter here if coconut oil is not available. Just increase the butter by 20%.

Egg: Egg not only adds more protein and nutrition in cookies but it also helps to bind and improve texture of the cookies resulting in more light and chewy cookies. However you can totally make them eggless too by substituting 1 egg with flaxmeal. 1 tsp ground roasted flaxseeds in 4 tbsps water. Let it sit for 10 minutes. Use this mixture in place of egg or use 1/4th cup of greek yogurt. 

Dates: I have added dates as a natural replacement for sugar. Dates are also rich in iron, fibre and antioxidants. If you want to substitute dates in this recipe, you do that by adding 1/4th cup of pure maple syrup.

Dark Chocolate: Use a good quality dark chocolate, atleast 70%. You can totally substitute it by adding raisins, black currants, cranberries, walnuts, dried blueberries or any other dried fruits or nuts of your choice.

Now let’s get to the recipe

Recipe: makes 14 to 15 cookies

Ingredients 

  • Rolled Oats: 1 cup
  • Wholewheat flour: 1/2 cup
  • Apple: 1 medium
  • Virgin Coconut oil: 3 tbsps
  • Egg: 1 
  • De-seeded dates: 4
  • Baking powder: 1/2 tsp
  • Cinnamon powder: 1/2 tsp
  • Vanilla Extract: 1 tsp
  • Dark Chocolate chunks (70%): 1/2 cup

Method:

  • Soak dates in hot water for 10 minutes to soften it.
  • Sieve wholewheat flour, baking powder and cinnamon in a large bowl. Now mix rolled oats. Keep aside. 
  • In a blender, crack an egg or add flaxmeal/yogurt. Add chopped apple, softened dates, vanilla and oil. Blend this mixture to a purée.
  • Now add wet ingredients to dry ingredients in batches. Mix till everything incorporates well. Do not over mix. Cut and fold gently.
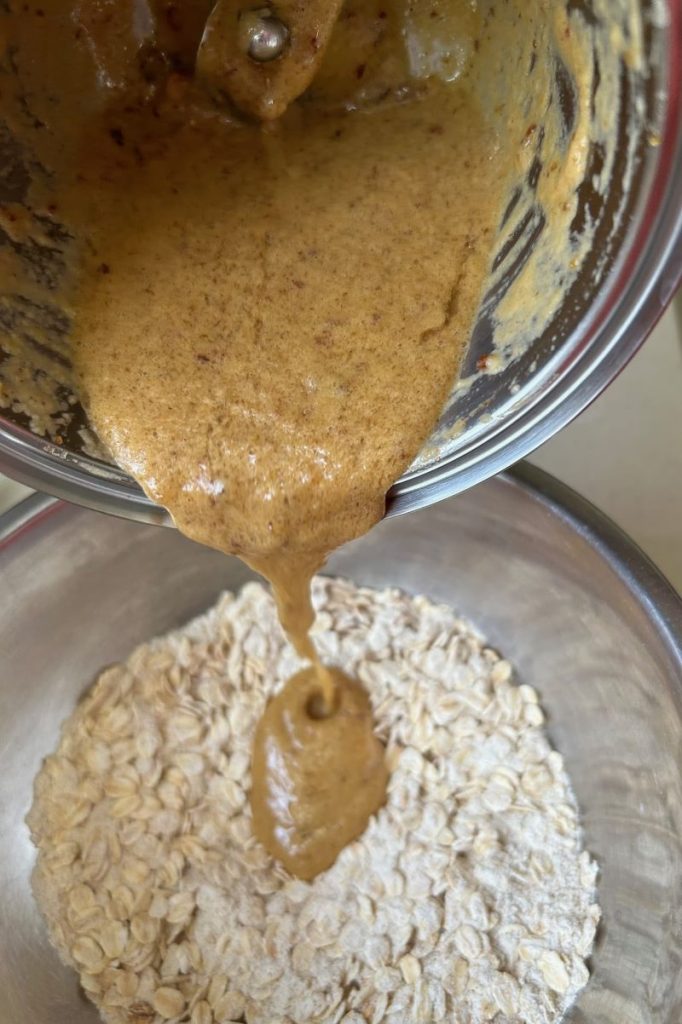
  • Add chocolate chunks and mix well. The mixture will be moist at this time. You can refrigerate the cookie dough for 30 minutes. It will become easier to give it a shape. Also, the oats will absorb the flavour and soften.
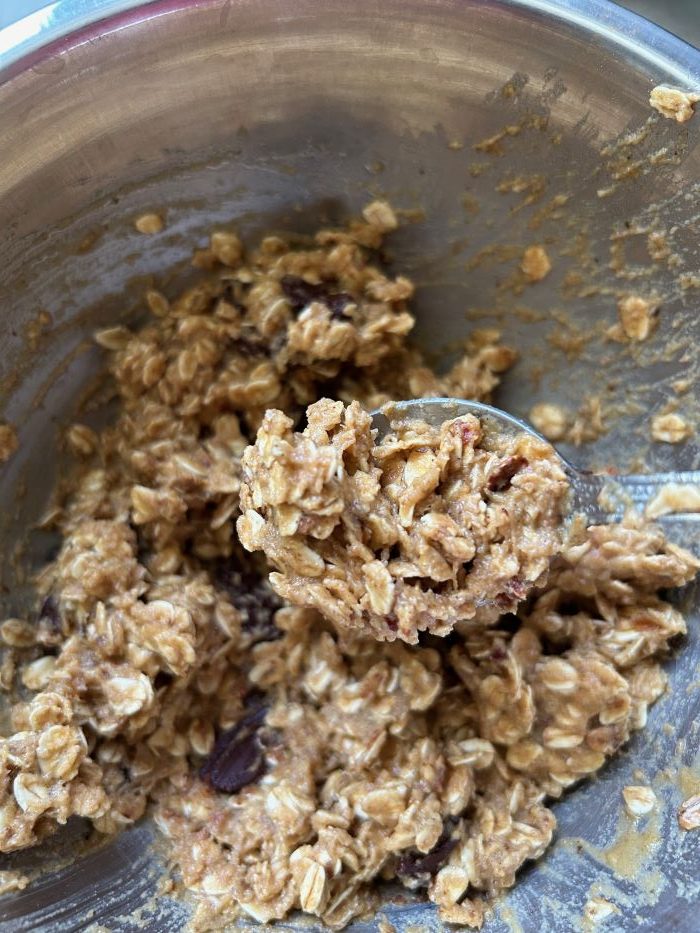
  • Line baking tray with a baking paper or a silicon sheet.
  • Take one tbsp scoop and scoop out the mixture on the baking tray. Scoop will give you even size cookies. Flatten a little with a back of a spoon.
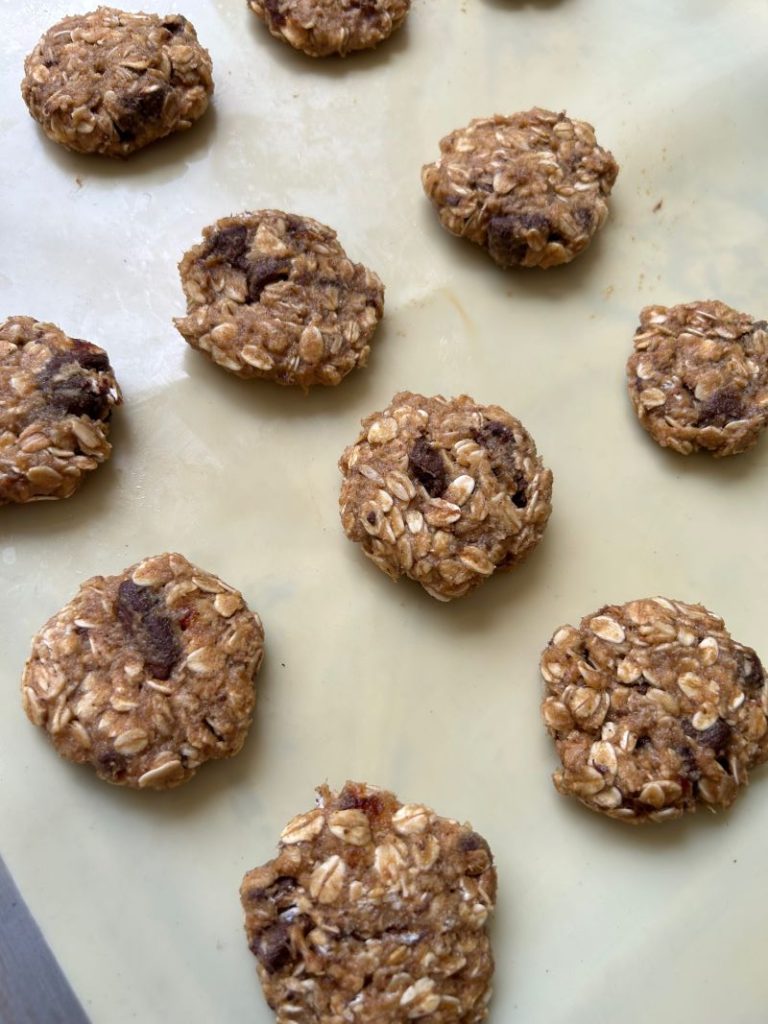
  • Bake in the preheated oven for 10 to 12 minutes at 180 C
  • Transfer on a wire rack. Allow it to cool. Once cooled, store in an airtight container.

How to store

These Healthy Cookies store well for a few days, so you can make a batch on the weekend and enjoy them throughout the week. Store in an airtight container at room temperature or in the fridge for up a week. They will soften further as they sit in the container making it perfect for toddlers. 

You can also try more of such healthy bakes- Healthy Carrot Orange Marmalade Cake and Wholewheat Banana and Jaggery Cake. 

Do give these healthy cookies a try. I am sure you and your kids will love it. Let me know in the comment section below if you do give it a try. It will be great to hear from you guys. Stay Healthy! 🙂

Posted on Leave a comment

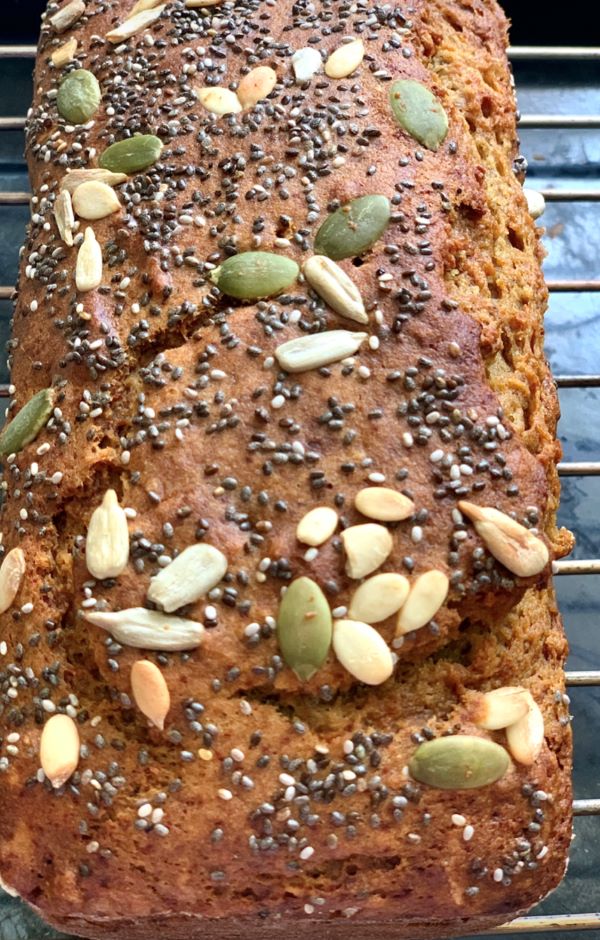
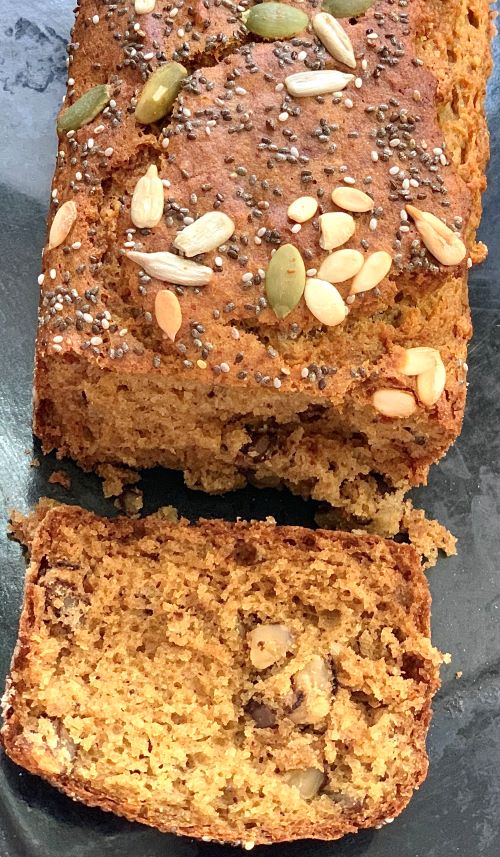
Wholewheat Jaggery Banana Tea Cake aka Healthy Banana Bread

I am a mother of a ten year old. Now, all the mothers out here will agree with me that when it comes to kids, we always try to find healthy ways to feed them their favourites.

I absolutely love Banana Bread. I think the true existence of bananas were to become over ripe and transform into banana bread. This Banana Cake comes out insanely delicious and is so much more healthier for you. It is dairy free with goodness of wholewheat flour, jaggery and walnuts. Bananas add such a brilliant taste to baked goods that it amazes me every time. The gooeyness of bananas combined with nuttiness of wholewheat flour and earthiness of jaggery makes this banana cake irresistible. This gets polished off at my house before I even know it. I barely get to eat a slice.

Ingredients used that make this Cake Healthy and their Substitutes

Wholewheat Flour: Whole wheat flour is a whole grain that provides more fiber and other nutrients naturally than refined enriched flours. It can be used in place of all-purpose flour in baking and cooking. However, if you don’t have wholewheat flour, you can try this recipe with combination of other flour like rolled oats flour, finger millet or gluten free flour.

Jaggery Powder: It gives banana bread its rich caramel flavour. It is so much more healthier than refined white sugar. Jaggery has cleansing properties that help clear the lungs and respiratory tract. Other health benefits of jaggery include improved immunity, anaemia prevention and improved digestive health. If you do not have it on hand, the you can use coconut sugar, unrefined palm sugar or any other unrefined sugar.

Egg: Apart from nutrition, egg adds structure and texture to banana bread. If you want to make this cake eggless, you use 1/4th cup of yogurt or milk of your choice as a substitute of 1 egg. This will yield similar results.

Cinnamon: With its warm, sweet and slightly spicy flavour cinnamon adds a lot of depth to baked goods. However, if you don’t want to use it, you can omit it.

Walnuts: Walnuts provide great flavour, texture, and a beautiful crunch to banana bread. They have a mild and creamy taste which makes them perfect for cakes. You can skip them if you don’t like or add chocolate chunks or chips or toasted almonds in this recipe. You can also add dried fruits like raisins, dried cranberries, dried blueberries etc.

This recipe is absolutely fuss free and easy peasy. It requires no endless whipping and whisking. Just throw everything in the blender and then mix dry ingredients with wet ingredients. That’s pretty much it. With little effort required, this Banana Bread will fill your house with the beautiful aroma that feels like a warm hug. If you want more of such fuss free healthy cake recipes, you can try my Wholewheat Carrot Orange Tea Cake recipe too.

Recipe

Ingredients

  • 1 cup Wholewheat Flour
  • 2 medium size over ripe Bananas
  • 1/3rd cup Jaggery Powder
  • 1 large Egg
  • 1/4th cup Coconut oil/Olive oil/Non-fragrant Oil
  • 1/2 tsp Baking Powder
  • 1/2 tsp Baking Soda
  • 1/4th tsp Cinnamon Powder
  • 1/4th tsp Salt
  • 1 tsp Vanilla Extract
  • 1/2 cup chopped Walnuts
  • 1/4th cup mixed Seeds of your choice (optional)

Instructions

  • Preheat oven at 180 C ten minutes prior to baking.
  • Line a 6 by 3 inch rectangular pan with a parchment paper or alternatively grease baking tin with oil and dust it with some flour.
  • In a blender or food processor, add bananas, oil, jaggery powder, vanilla extract and egg and blend till everything combines well.
  • In a large bowl, sieve wholewheat flour 3-4 times. This will add more air and will ensure that the cake doesn’t get a dense texture.
  • In the same bowl, sieve baking powder, baking soda, salt and cinnamon powder. Add chopped walnuts to dry ingredients. Mix everything well and keep aside.
  • Now, add wet ingredients in the blender to dry ingredients in 2 or 3 batches. Cut and fold gently each time. Do not over mix the batter.
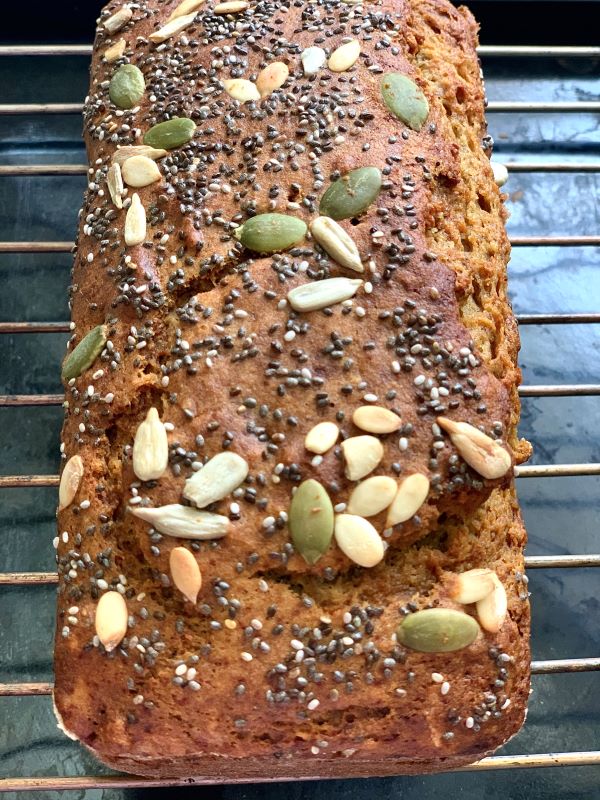
  • Add the prepared batter to the cake tin. Top it with mixed seeds. Tap the pan on the shelf 2-3 times to clear out all the air bubbles.
  • Bake for 35 minutes or till toothpick inserted at the centre comes out clean. Allow it to cool for 15 minutes in the pan. To remove the cake from the pan, simply run a blunt knife around the edges and invert on the wire rack. Tap the pan 2 or 3 times and the cake will slide out.

Pro Tips

  1. Use the yellowest of bananas. Actually, the blacker the better. Over ripe bananas are the sweetest and are perfect for baking.
  2. Ensure the jaggery powder is smooth and fine to avoid grainy batter. You can sieve the powder to get rid of grainy bits.
  3. This cake will be a little more moist than your usual cakes because of the use of jaggery and bananas, so let it cool completely before trying to turn it out or you will end up breaking it.
  4. This recipe can also be used to make muffins. It will give 8 to 9 muffins.


Posted on Leave a comment

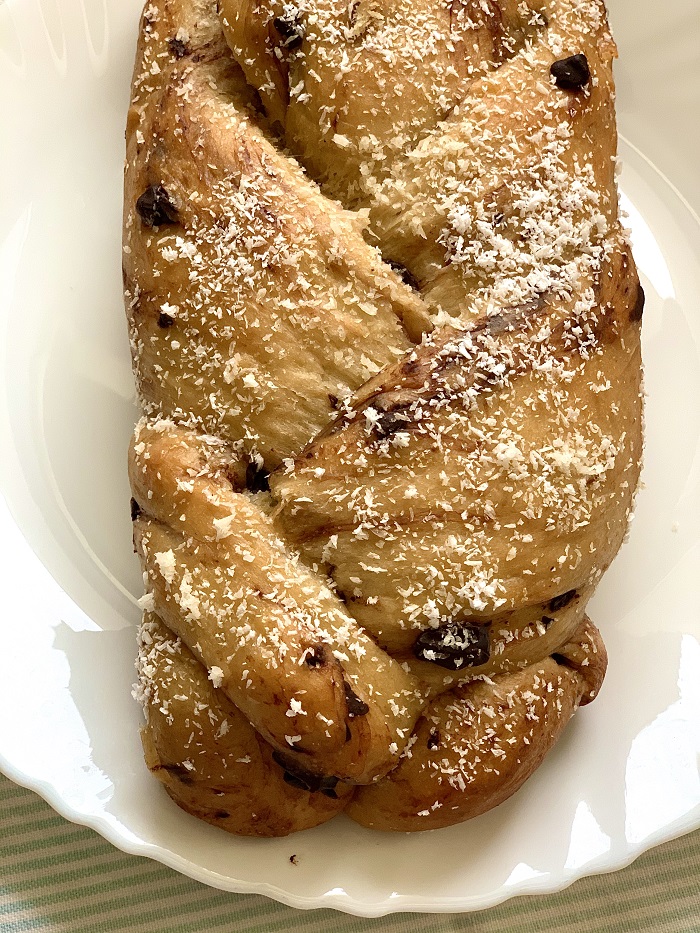
Braided Coconut and Banana Bread- Bread making made easy

This Braided Bread Recipe will help you make beautiful bread with golden brown crust and soft, moist and delicious crumb. The flavor of this bread is mildly sweet. The sweetness comes from banana and coconut milk. 

Even if you’ve never made homemade bread or worked with yeast before, this homemade bread is for you. It’s the perfect beginner recipe. This recipe makes one loaf, no bread machine and no mixer required!

There’s something so warm and comforting about homemade freshly baked breads. If you haven’t tried bread baking before, I insist that you do. It becomes a culinary experience that is worth the effort! Freshly baked bread, made with pure ingredients, straight out of the oven is one of life’s greatest pleasures. There is something special about kneading the bread with your own hands and watching in anticipation as the dough rises into a perfectly baked loaf.

I baked this bread for the first time in 2021 after taking a month long break from social media. The time was highly stressful for me so I didn’t feel like making anything out of the routine. This was the time when both my parents had Covid and I was extremely worried. It was when they completed their 14 days of quarantine and were absolutely fine then, I immediately got the urge to bake something nice, comforting and something that gives me absolute joy.

So now, without further delay, let’s jump to the recipe.

Prep time: 3 hoursYields: 1 9-inch loaf
Cook time: 25 minutes 

Ingredients

  • 350 grams Wheat Flour (I used 200 grams Wholewheat and 150 grams All purpose flour)
  • 2 tbsps Castor Sugar/Honey
  • 1 tsp Salt
  • 2 tbsps Milk powder (optional)
  • 2 small or approx 150 grams overripe Bananas, fork mashed or blended 
  • 1/2 tbsp Instant yeast
  • 40 grams Unsalted butter (softened)
  • 1 large egg, lightly beaten
  • 70 ml Warm Coconut milk (depends on the flour. Some brands of flour need extra liquid)
  • 2 tbsps Shredded coconut 
  • 2 tsps Vanilla extract
  • Dark Chocolate Chunks (optional): as much as you like

For egg wash

  • 1 small egg
  • 1 tsp cream

Method:

  • In a bowl mix yeast and sugar/honey. Add half warm coconut milk. Cover and let it sit for 10 minutes or till it gets foamy. I like to do this step even if the yeast is instant, just to be sure that the yeast is still active. Make sure the coconut milk is warm and not hot.
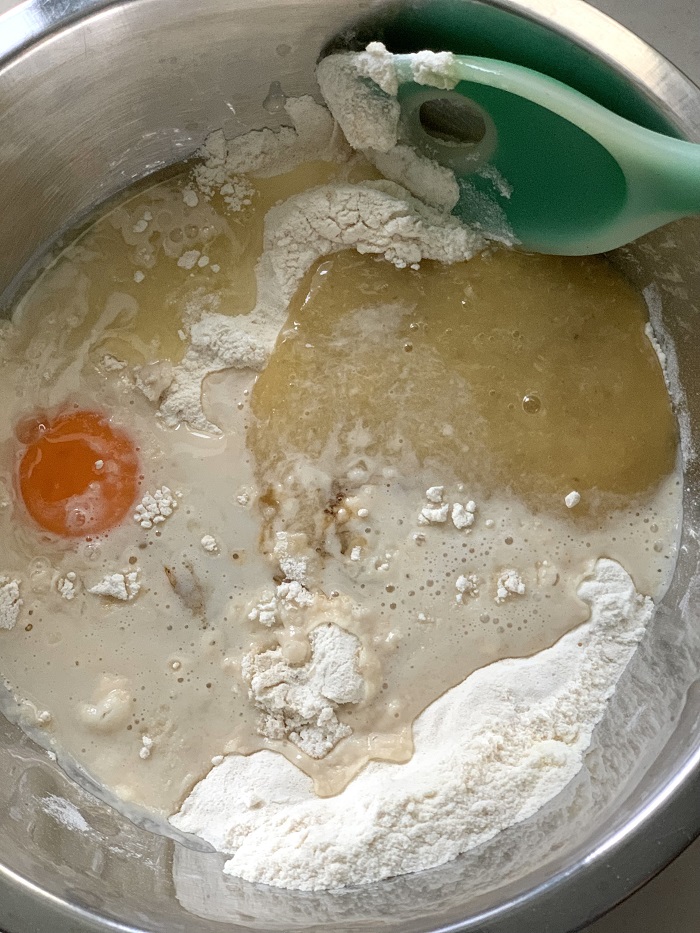
  • In another large mixing bowl, add flour, salt, egg, milk powder, banana & vanilla extract.
  • Once the yeast is foamy, add it to the flour. Bring it all together with a silicon spatula or wooden spatula. Gradually add rest of the coconut milk and bring everything together. The dough will be sticky at this point.
  • Dust some flour if required (otherwise avoid) and knead the dough well for 10-15 minutes. Keep adding butter in batches while kneading the dough. The temptation to add more flour will be quite strong at this step but you must resist adding more flour. Keep working with the dough. It will come together and eventually will not be sticky. Be patient!
  • Once done kneading, grease the dough and bowl with some butter. This will prevent the dough from drying out while proofing. Cover and allow it to rise for 1.30 to 2 hours or till it the dough doubles in size. The dough will just about double in size, stick to the sides of the bowl, and have a lot of air bubbles.
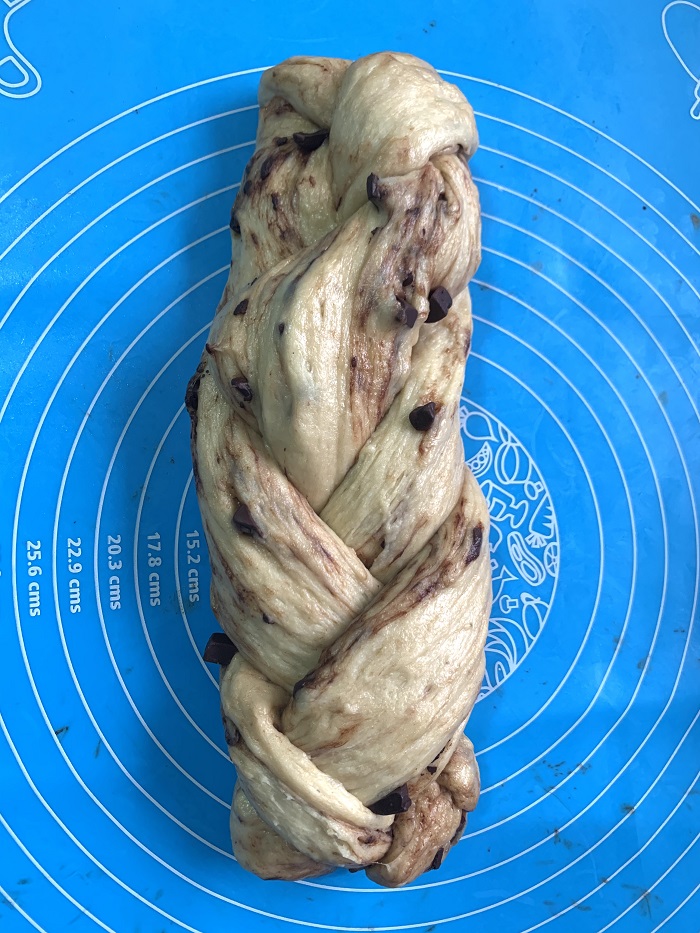
  • After the first proof, punch the dough down. Add & mix chocolate chunks. Knead for 1 or 2 more minutes. Divide the dough into 3 equal parts.
  • Roll each piece into a long rope of about 13 to 15 inches. Place the 3 ropes parallel to one another.
  • Pinch the top of the ends together. Braid the dough loosely tucking all the edges under the braid.
  • Lift the bread gently and place it on a well greased 9×5 rectangular loaf pan. 
  • Cover and allow it to proof for another hour. Once ready to bake, prepare the egg wash. Just stir together the egg and the cream. Brush the egg wash over the dough. Refer notes.
  • Add shredded coconut on top. This is optional but toasted coconut tastes great and adds to the nuttiness.
  • Heat the oven 10 minutes prior to baking at 180C. Bake for 25 minutes or till the top has browned. 
  • Let the bread cool on the baking pan for 5-10 minutes. Remove to a wire baking rack to cool to room temperature.

Notes:

  • How do you know the first rise is done: This can take one to three hours, depending on the temperature and moisture in the dough. Check your dough. If it has doubled in size, it’s good for second proofing. Generally speaking, a warm, humid environment is best for rising bread.
  • How do you know your bread is ready for baking? To check that your dough has risen to its full capacity, gently press a fingertip into the surface – if the dough springs back, it means the gluten hasn’t developed fully, so you can leave it for a little longer. If the indentation left by your finger remain, it means the gluten has stretched as much as it can and the dough is ready to bake. Don’t leave it any longer or the air bubbles will start to collapse and your bread will be dense.
  • You can bake this bread with All purpose flour alone but I do not recommend baking it with just whole wheat flour. The bread will come out very dense.
  • You can also refrigerate the dough after first proofing for 12 to 18 hours. It will slowly proof in the refrigerator. This will intensify the flavors further.
Posted on Leave a comment

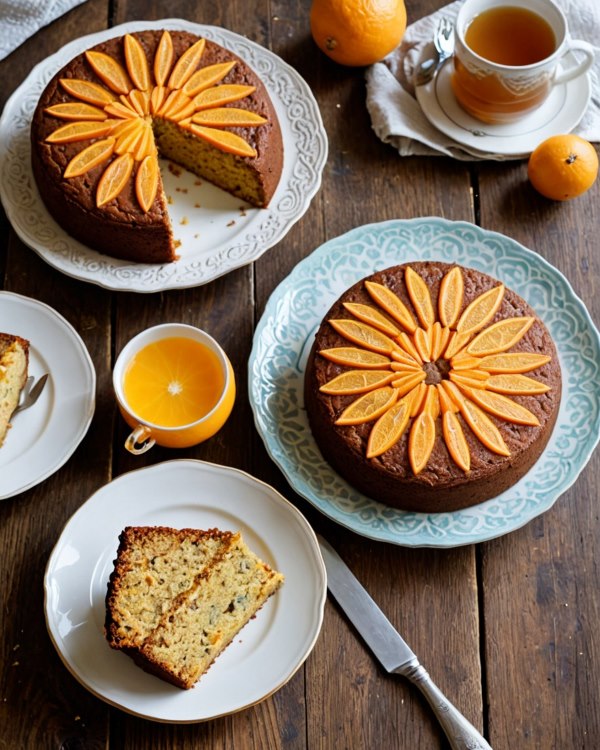
Wholewheat Carrot Orange Tea Cake- Kid Friendly Easy Recipe

Carrot cake is my and my child’s all time favourite. There’s something so heartwarming about a good carrot cake. As soon as those orange carrots hit the Indian market, this is one thing I crave. 

Why did I add orange to this cake? Well, I think it gives it that special subtle finesse that makes it stand out. Orange flavor goes beautifully with carrots. It gives a burst of citrus flavour along with a bright punch.

One bite of this can even convert those silly people who don’t like carrot cake 😄 Who are these people anyway!

My child loves to carry a slice of cake or a muffin in his school snack box. So I had to make it healthy and equally delicious for my child. This is the recipe that I mastered after a few failed attempts. Well, not exactly failed though. Those failed attempts were edible too but this one comes out to be perfectly soft, moist and fluffy

It is made using Wholewheat flour and Jaggery. Now baking with wholewheat flour can be a little tricky. It can make the texture of the cake dense. To ensure that your cake remains light and fluffy, the trick is to sieve wholewheat flour 3-4 times. This will add more air and the cake will not come out dense.

This recipe is actually so easy to make that anyone who hasn’t tried baking before will be able to crack it. Being a mother I understand how busy days get and trying those time consuming recipes can be quite daunting at times. To save you from all that hassle, all you have to do is put everything in a blender and Viola! Your batter is ready in less than 5 minutes. This will also save you from washing too many bowls which is quite a task when you have to bake.

Do try out this recipe and let me know. Trust me it will not disappoint you. 🙂 You can frost this cake with your favourite cream cheese frosting. This recipe is a make-ahead cake recipe whose taste and texture will not be compromised.

This cake is not overly sweet. I don’t prefer too sweet desserts. Feel free to add more jaggery if you like.

Recipe: cup measurement 250 ml

Prep time: 15 minsCook time: 30 mins


Ingredients

  • 2 medium size Carrots, shredded
  • 3 heaped tbsps Orange Marmalade 
  • 60 grams softened unsalted Butter or any non-fragrant oil
  • 1/2 cup Jaggery powder
  • 1 1/2 cup Wholewheat flour
  • A generous pinch Salt
  • 2 small Eggs
  • 1/2 cup Milk 
  • 1/2 tsp Vanilla extract
  • 1/2 tsp Baking soda
  • 1 tsp Baking powder
  • Handful of Chopped Walnuts (optional)

Method

  • In a blender, add butter, jaggery, lightly beaten eggs, milk, shredded carrots, marmalade & vanilla extract. Blend well on high speed till everything comes together. Take it out in a large bowl.
  • In another bowl, sieve wholewheat flour, baking powder, baking soda and salt. Add walnuts now if using and combine everything well. 
  • Add dry ingredients to wet ingredients in 2 to 3 batches. Gently cut & fold each time till everything incorporates well and there are no lumps. Don’t mix rigorously or over mix the batter. This will lead to a dense cake texture.
  • Preheat oven at 180C 10 minutes prior to baking. Grease a 7 inches diameter round pan or 11x7x2 inches rectangular baking pan with butter and line it with parchment paper or alternatively you can dust it with some flour. 
  • Add the batter. Tap the pan on the shelf 2-3 times to clear out all the air bubbles. Now, bake for 30 minutes on the middle rack of your oven or till a toothpick inserted at the center comes out clean. 
  • Allow it to cool for 15 minutes in the pan and then transfer it on a wire rack to cool completely. If you find that the cake is sticking to the bottom of the pan, leave the cake upside down for sometime and let gravity do it’s thing.

My Pro Tips:

  1. Use fresh baking soda. It looses it potency after 6 months of opening it.
  2. When measuring dry ingredients, level it off using the straight edge of a spoon or a butter knife.
  3. This recipe makes 12 muffins. Bake them for 14 to 18 minutes and allow the muffins to cool completely on wire rack.
  4. You can add cinnamon and ginger powder to this recipe to add a warm touch to it.
  5. If you want this cake to be perfectly moist, use fresh carrots and shred them. DO NOT USE packaged pre-shredded carrots for this recipe. This is the prime moisture for your cake and you don’t want to miss it.
  6. In case you want to bake this cake for yourself and are feeling fancy, I would highly recommend adding Orange Whiskey Marmalade. Orange and whiskey combination can lift your simple cake to something gourmet. You can buy it here-

Substitutes:

  • Eggs: You can either use flaxmeal or 1/4th cup Greek yogurt for every egg. For flaxmeal, take 1 tbsp flaxseeds for every egg. Coarsely ground them. Add 4 tbsps of water and let it sit for 15 minutes. It will become like a slimy gel like mixture. Use this as a substitute for one egg.
  • Orange Marmalade: If you don’t want to use Orange Marmalade, you can use 1/4th cup of freshly squeezed orange juice along with a tsp of orange zest instead. If using orange juice, you might have to adjust sugar accordingly. Add 1 or 2 tbsps of extra jaggery powder.
  • Jaggery: In case you don’t have jaggery powder, you can use any unprocessed sugar like palm sugar, coconut sugar etc.
Posted on 4 Comments

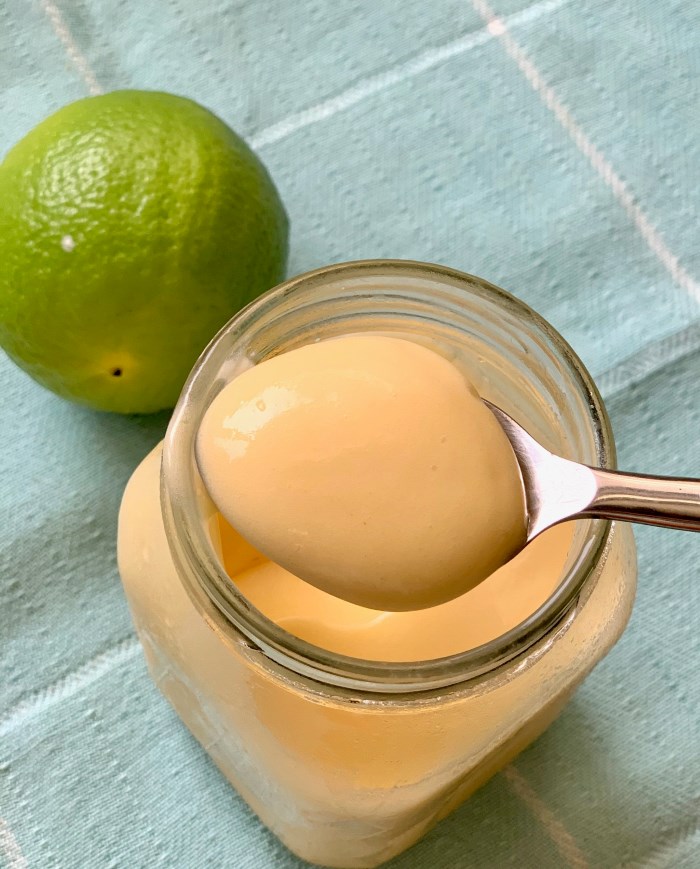
Silky Smooth Lemon Curd- ( Totally Fool-Proof Method)

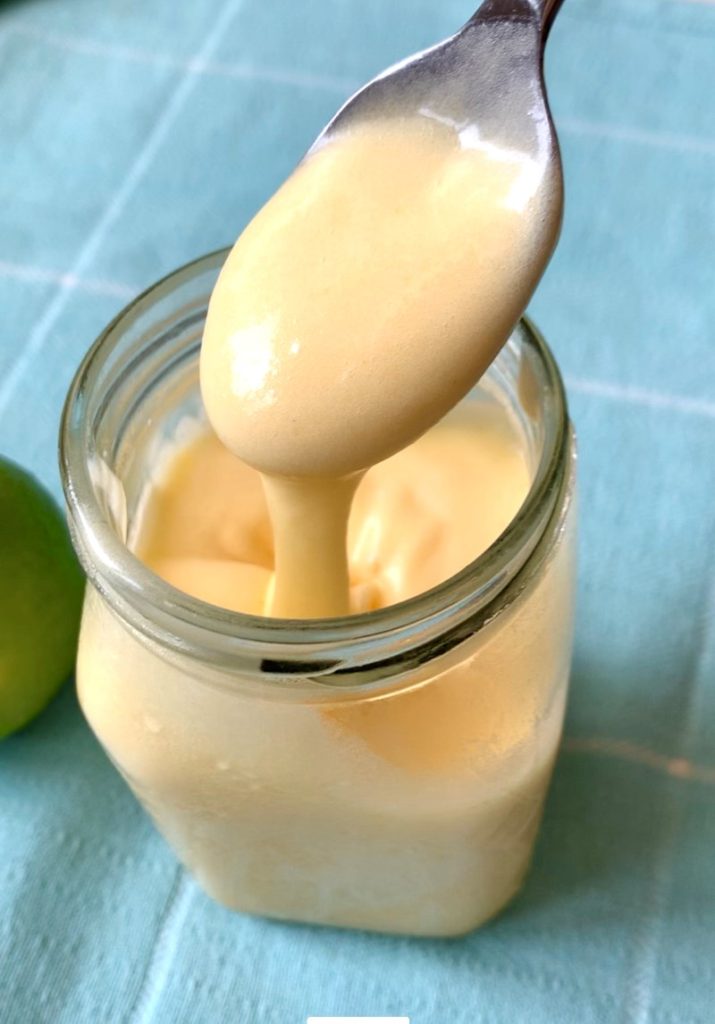
Lemon Curd is a rich, soft, buttery and custard like spread or topping that has a deliciously tart yet sweet citrus flavour.

This method of making Lemon Curd is totally fool-proof. It will ensure a perfect velvety smooth lemon curd with no lumps. I discovered this perfect trick to make Lemon Curd after few hits and trials.  It is so easy that I started calling it Fool Proof Lemon Curd Recipe. 

I can bet that you will stop buying it from the market once you use this recipe. Your store bought doesn’t even come close to this. One spoonful of this and you will literally go “mmmmmm”. It’s that good.

The trick to make perfectly smooth lemon curd is whole egg. Most cooks don’t use egg white in Lemon Curd because chances of egg white coagulating is higher but egg white gives a very light, almost custardy texture which I love. The trick to get it right is simple. You just have to whip it well, keep stirring and cook on low flameDO NOT LET IT BOIL!

How to use Lemon Curd?

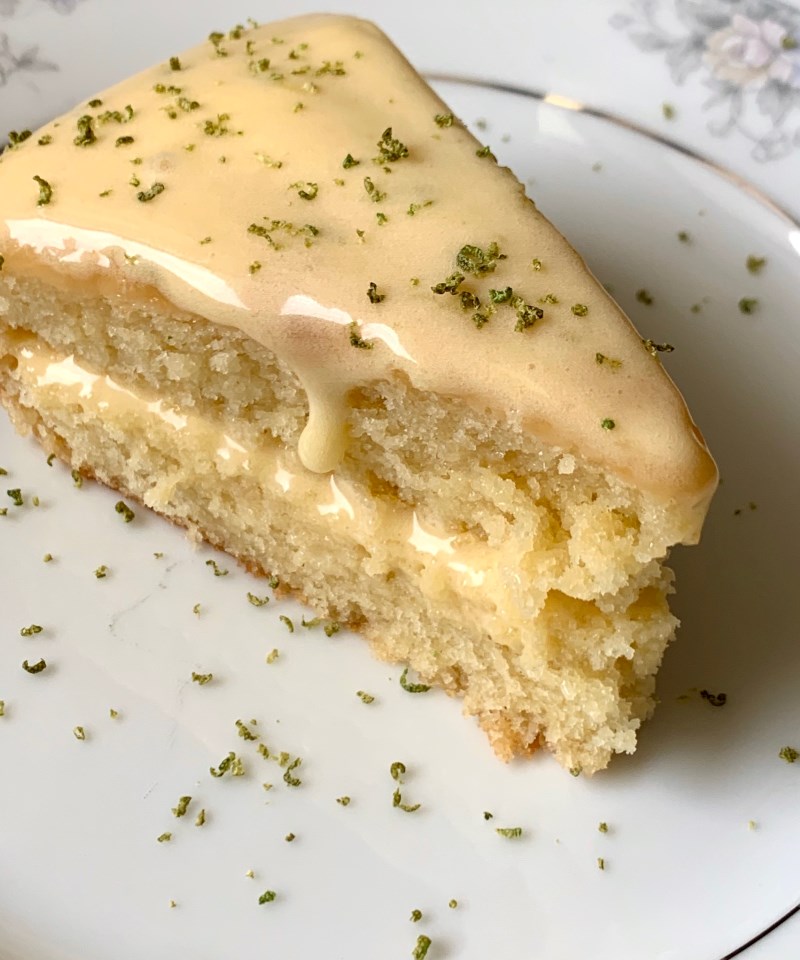
Well, there are countless ways to use it. While traditionally it was used as a spread for scones. But it makes a delicious filling or topping for tarts, pies, cakes, pancakes, crepes, cheesecakes and the list goes on and on. 

How long does it last?

If stored in a refrigerator in an airtight glass jar, this can last you almost a month. And yes, this freezes well too. Just thaw before using it and it is good to go. 

Points to Remember

  • I like to use Meyer lemon for making this but you can use whatever is easily available.
  • It is always good to weigh the ingredients and not use a rough estimate in recipes like these. 
  • Always use a double boiler for this recipe. If you don’t have a double boiler, make a makeshift double boiler by placing a heatproof glass bowl on top of a larger pot. Just make sure the bottom of the bowl does not touch the water in the larger pot. 

Recipe

Prep time: 5 minsServing: makes 400 ml
Cook time: 15 mins

Ingredients

  • Egg yolks: 2 large
  • Whole egg: 1
  • Castor sugar: 80 gms
  • Cornflour: 1 tbsp
  • Lemon juice: 90 ml
  • Cold Butter: 75 gms (cut in cubes)
  • Salt: 1/4th tsp
  • Lemon zest: 1 tsp

Method

  1. Before starting, keep all the ingredients ready. Keep butter cubes in refrigerator.
  2. Make a double boiler setting. Take a pan and a heat proof bowl. Use either a glass bowl or a stainless steel bowl. No aluminium. Add some water in the pan. The bowl should not be touching the water. 
  3. In the heat proof bowl, add egg yolks, whole egg, cornstarch & sugar. Whip till it becomes light and fluffy and sugar almost melts. This should take 2-3 minutes.
  4. Heat lemons in microwave for 10-15 seconds and squeeze out 90 ml juice. Add lemon zest to the heat proof bowl and then gradually add lemon juice in 2-3 batches, whisking each time. 
  5. While you are whisking, heat the water. Do not let the water boil. Now put the heat proof bowl on top. 
  6. Cook on the lowest flame. Keep stirring continuously till it thickens. This is very important otherwise chances are the eggs will coagulate. It’ll take roughly 15 minutes. 
    In case the water beneath starts boiling, take it off heat for a few seconds then put it back. The idea is to allow it to cook & thicken on low heat.
  7. Take a wooden spoon/spatula and check after 12 minutes. It should coat the back of the spoon. Slide your finger, if the path is clear then it’s cooked. If not or you are unsure, cook it for a few more minutes. 
  8. Once off heat, add cold butter cubes one by one and keep whisking continuously till it incorporates fully. Then sieve it for a smooth lemon curd. Transfer it to an airtight glass jar and refrigerate. It’ll thicken further on cooling.
  9. It tastes much better after 1-2 days. If you plan to make a dessert using lemon curd, make it a couple of days in advance.